Framing
As described elsewhere, there are several ways to approach framing.
Whether metal or wood frames are used, start by preparing the frame package. Clean the glazing well. With glass, use a good glass cleaner, and a clean cloth. Newsprint is also excellent for a final wipe-down. If using acrylic, it is important to use an acrylic cleaner, as any ammonia will (eventually) fog the acrylic. Only use cloth on acrylic (like an old T-shirt). Any kind of paper product will scratch it.
Once the glazing is clean, assemble the frame package. Check for dust under the glazing. At the point, it is a pretty good idea to wear cotton gloves, to keep from getting fingerprints on anything.
If you are using wood frames, the holes for screw eyes or strap hangers will probably need to be pre-drilled. Do this before the frame package goes in. Place the hanger ¼ of the way down the height of the frame. With screw eyes, it is generally easier to go ahead and put them in before you put the frame package in. Strap hangers can be done either before or after.
Next, place the frame package into the frame. With metal frames, assemble three sides of the frame, and slide the package in. Check again for any dust under the glazing, then put in the last side. With wood, tip the package in, usually a short side first. Again, check for dust.
Once a metal frame is assemble, check to see if spring clips are needed. These are metal springs that hold the package tight against the fron of the frame. Unless the package is unusually thick, the clips should be used. Insert one end between the molding (frame) and the backing board, then slip the other end under the molding. How many you need depends on the size of the piece. Use enough to hold it securely.
Wooden frames require points to hold the package in. These can be put in using a point gun (recommended), or as push points. Push points have tabs on them, allowing them to be pushed into the wood. Lay them flat on the backing board, and using a putty knife and slow steady pressure, push the point into the wood. With a point gun, place the gun flat on the backing board, push it firmly against the frame, and fire away.
When using points, start in the center of a side, then go around the frame, putting one point in the center of each side. Then put another point on each side of the center ones, about two inces or so from it. Again, go all the way round. Continue this way, until you get to the corners.
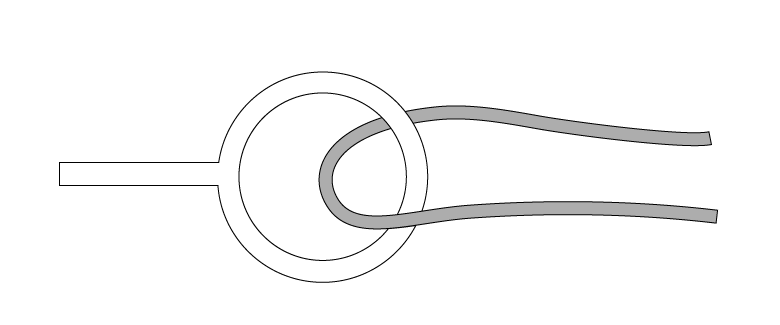
The final step is to wire the piece. Use real picture wire. Start by runnning the wire through one side to the other. With about an inch and a half or so, bend the wire over on the far (end) side.

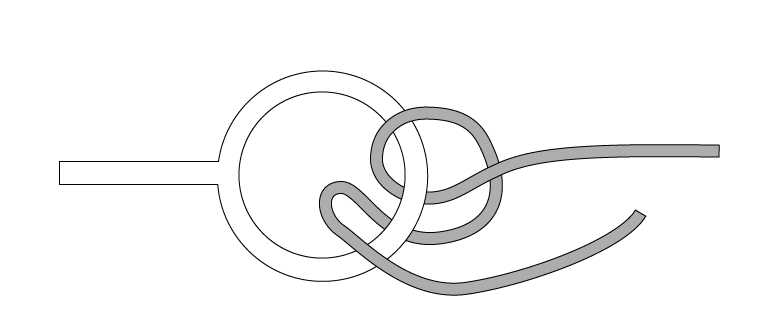
Now, loop the wire around itself, then back through the hanger:

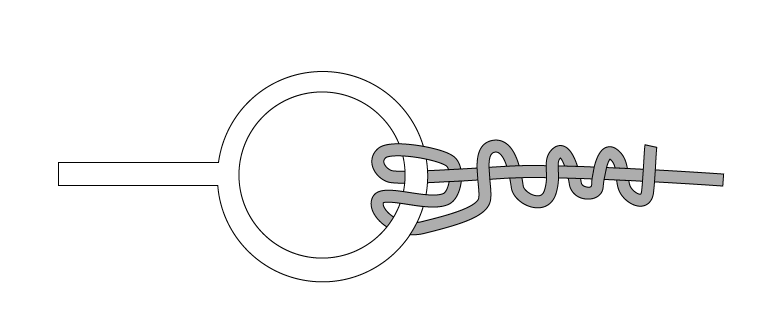
Pull everything taut, and wrap the excess:

On the other side, pull the wire tight, then repeat the above process, and you are done.