The Test Print
Making proper test prints, and evaluating them, is critical to making good prints. this cannot be understated. Taking time and effort to make proper test prints will save both time and money.
Begin by getting the image sized and focused. Set the printing frame to cover the edges of the paper, holding it flat. Open the enlarger lens all they way, so it is at its brightest. Move the enlarger up or down to place the entire image inside the blades of the frame, focusing as you go. A piece of photo paper that has been fixed out (fixed and washed so the emulsion is stabilized) can be placed in the frame to focus on. This will add the thickness of the paper, and also give a white surface. This paper can also have grids or guides drawn on it to help center he image.
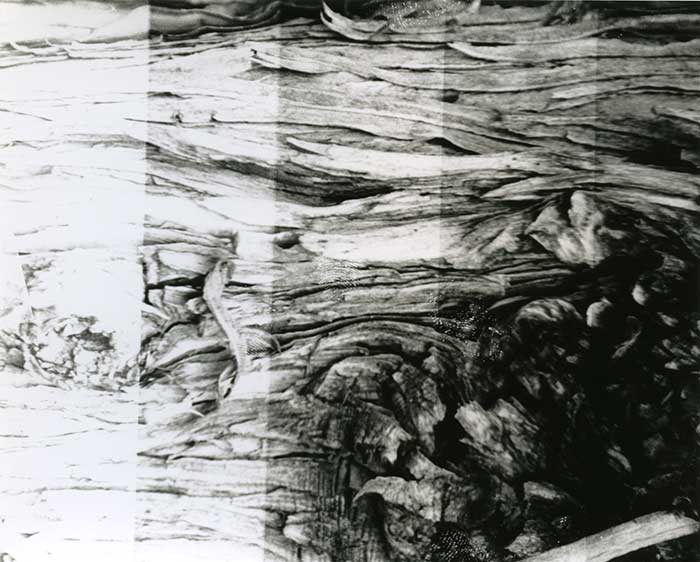
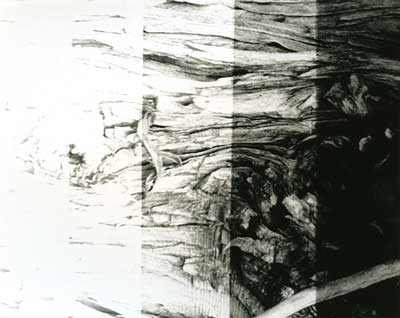
The test print is an incremental series of exposures on a single piece of paper. Ideally, the test will show definite underexposure at one end, and definite overexposure a the other end. Also ideally, the increase in exposure will be gradual rather than abrupt.
With 8 × 10″ paper, start by quartering a sheet into four 4 × 5″ pieces. There is no economy in using a tiny sliver, as there is not enough image to properly evaluate. Find the part of the image with significant shadows, the brighter part of the negative image, by turning the enlarger on ('focus' on the timer). Shut the enlarger back off, and place the test paper (strip) on that area. Use masking tape to tape it down, so that it doesn't shift while doing the test.
With the enlarger stopped down, usually to ƒ/8 or ƒ/11, set the timer for an increment. Usually this is two seconds with no filter. If you are using polycontrast filters and split-filter printing (see the section on that), insert the filter being used. The first test for this method uses the #5 filter (magenta), which is fairly dense, so start with three second intervals.
The enlarger is stopped down for several reasons. The first is that lenses usually work better in the middle of their aperture range. The second is that you want a reasonable exposure time. Too short, and it is difficult to accurately judge the test. Too long, and you run the risk of the negative 'popping' or changing its shape due to heat from the bulb. The third is that by using a smaller-than-wide-open aperture, the lens will generate a small amount of depth of field, which will help correct small focusing errors.
The Intermittency Effect
These increments will be repeated in the final print. There is a difference between five two-second exposures and one ten-second exposure. The intermittence effect describes this difference. When a bulb or tube illuminates, it does not go to full illuminance instantly. Rather, it it builds to full. When a light source is turned on, it builds to full, then is at full illuminance, then falls off as it is turned off.
So, when doing a test print using a certain increment, you are cycling the light source on and off. This cycling needs to be repeated when you make the final exposure, or the exposure will be off. The sum effect of an extended exposure, that single 10 seconds instead of 5 two-second exposures, gives you more exposure. That intermittence that is done during the test needs to be repeated in the final print. The idea of testing is that you repeat exactly what you do during the test when making the final print.
There are two methods of exposing a test print, the arithmetic method, and the geometric method:
Arithmetic or Standard Test Print

Using an opaque piece of board, cover about four-fifths of the paper. Align the board perpendicular to the tonal area you are testing, in order to have that tonal area across the entire test. Hit the timer, exposing the strip for one increment.
Move the board down a fifth of the paper. Expose it for another increment.
Continue moving the board and exposing the paper for the same increment until you run out of paper. You will then have a series of exposures, from 1 increment to five or six. So using 3 second increments, the exposures will be 3, 6, 9, 12, and 15 seconds.
Continue on to process the test fully, and then evaluate.
Geometric or Stop Test Print

This method uses stop, or a doubling of exposure for each increment. The method takes a little getting used to, but makes a lot of sense in that the exposure increases by stops, rather than an arbitrary increment. It will also cover a wider range of time than the arithmetic method.
With an 8 × 10 enlargement, start with a 1 second setting on the timer. Expose the entire sheet for this.
Now cover up a fifth or so of the paper (the reverse of the previous method). Expose the paper for one more increment.
Move the board, expose for two increments. Then four, then eight, continuing to double the previous exposure. When finished, the test will have 1, 2, 4, 8, and 16 second exposures.
Continue on to process the test fully, and then evaluate.
Evaluating the Test
The test should reveal definite under- and overexposure. If the most exposure (the darkest strip) is not definitely too dark, then go back and make another test, either opening the enlarger a stop (more light, bigger aperture), or increasing the time increment. If the test gets too dark too fast (in the second or third strip) go back and make another test, either stopping the enlarger down (less light/smaller aperture), or using a shorter time increment.
The ideal is a test that reveals the exposure as fairly gradual, with the increments identifiable, but not abrupt. If the are too gradual, usually it is the case that the time was too short of the aperture too small, and you may not see overexposure. If they are too abrupt, then there is too much latitude in between successive exposures to properly evaluate.
Look at the darks, in particular the areas that should be dark with detail (Zone III). Since this is the thinner part of the negative, choose the shortest exposure that renders the tone you want.
If you are printing on graded paper, the next step is to decide whether or not to change paper grades. If you are printing on polycontrast paper, then the decision is to change filters, or move to split filter printing.